
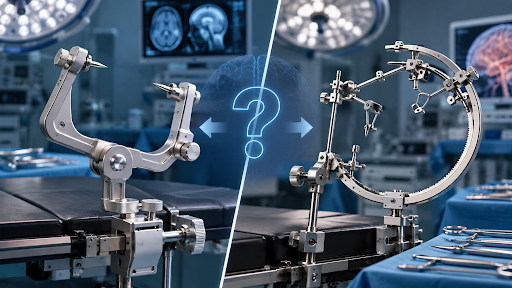
Positioning takes twenty minutes and decides how the next six hours go.
Every OT team knows this and most still treat it as the warm-up act — the bit before the real work starts. But a badly positioned patient costs the surgeon access, costs anaesthesia a calm airway, and occasionally costs the patient a nerve injury that has nothing to do with the operation itself.
The head clamp sits at the centre of all of it. Here is how the four standard neuro positions actually work, and what goes wrong in each.
Supine
The most common and the most forgiving.
Frontal, temporal and pterional craniotomies, most anterior approaches. The head is pinned, rotated and often slightly extended, then locked through the adaptor to the base unit.
Two things to watch. First, neck rotation — if you turn the head more than about 45 degrees, jugular venous drainage starts to suffer, and the fix is to bump the ipsilateral shoulder with a roll rather than forcing more rotation at the neck. Second, the degree of extension. Comfortable on the table does not mean comfortable for four hours, and the anaesthetist should confirm the airway before the drapes go on, not after.
Prone
Posterior fossa, occipital approaches, posterior cervical spine work.
This is where the sequence matters most. The head is pinned while the patient is still supine, and then the whole patient is log-rolled with someone whose only job is holding the head and clamp in line with the body. One person, one job, saying it out loud. That turn is not the moment for improvisation.
Once prone, check the abdomen is free. A compressed abdomen raises venous pressure, which means more bleeding in the field and harder ventilation. Check the eyes are clear of any contact. Check the endotracheal tube has not shifted during the turn, because it very often has.
And check the chin. Excessive neck flexion in a long prone case can cause tongue and airway swelling, and it is not obvious until extubation.
Lateral and park bench
Retrosigmoid and lateral skull base approaches.
The head clamp holds the skull, but the rest of the body needs as much attention. An axillary roll goes under the chest — not in the armpit — to protect the brachial plexus on the dependent side. The dependent arm is supported. The legs are padded between the knees and ankles.
A Mayfield neuro attachment with a well-machined ball socket adaptor earns its money here, because lateral positioning usually needs several small angle corrections before the surgeon is happy. An adaptor that locks firmly in one action makes that iterative process quick. One that needs two hands and a nudge makes it slow and tempting to settle for “close enough”.
Sitting
Used for posterior fossa and pineal region work, where gravity drainage gives a cleaner field.
It is also the position that demands the most from everyone in the room. Venous air embolism is the well-known risk, which is why these cases need appropriate monitoring and a team that has discussed the plan beforehand. Haemodynamic changes on sitting up need anticipating rather than reacting to.
For the positioning itself, the chin-to-sternum distance is the number to protect. Too much flexion compromises the airway, venous drainage and, in some patients, spinal cord perfusion. The usual rule of thumb is to keep roughly two fingerbreadths of clearance.
The mistake that causes the worst injuries
This one is worth its own section because it is rarely written down anywhere.
Once the head is pinned and locked, the skull and the operating table are effectively one rigid structure. If the base unit is mounted to the table and you then tilt or flex the table, the head travels with it — which is fine. If the base unit is mounted to something that does not move with the table, or if the table articulates in a way the mounting did not anticipate, the neck takes the difference.
So before anyone touches a table control after pinning, say it out loud. Every time. And confirm during setup which table segment the base unit is mounted to.
What the equipment should let you do
A single system should cover all four positions without swapping components. That is the practical reason this design has stayed standard for decades.
Which means the checks are straightforward. The base unit has to mount properly to your table rail or head-end receptacle — confirm the rail cross-section in millimetres before ordering, since European and American rails differ. The adaptor has to allow free positioning and then lock without drift. And the kit needs a horseshoe headrest for the cases where pins are not appropriate, plus separate adult and paediatric pin sets.
Ventek India supplies its neuro OT table attachment as a complete kit on that basis — head clamp, base unit, ball socket adaptor, silica horseshoe headrest, both pin sets and a carry box — with connect teeth matched to DORO and Mayfield swivel adaptors already in use in most Indian neuro theatres.
Before the drapes go on
A short pause helps more than any checklist taped to the wall.
Confirm the pin sites. Confirm the adaptor lock is fully engaged. Confirm the airway with anaesthesia. Confirm pressure points are padded and the dependent limb is supported. Confirm everyone knows the table is not to be moved without a call-out.
Ninety seconds. It is the cheapest safety measure in the entire theatre, and the one most often skipped because the surgeon is already gowned and waiting.